 Help Center
Getting Started with Cub Guide
Follow these step-by-step tutorials to set up your classroom and start tracking in minutes.
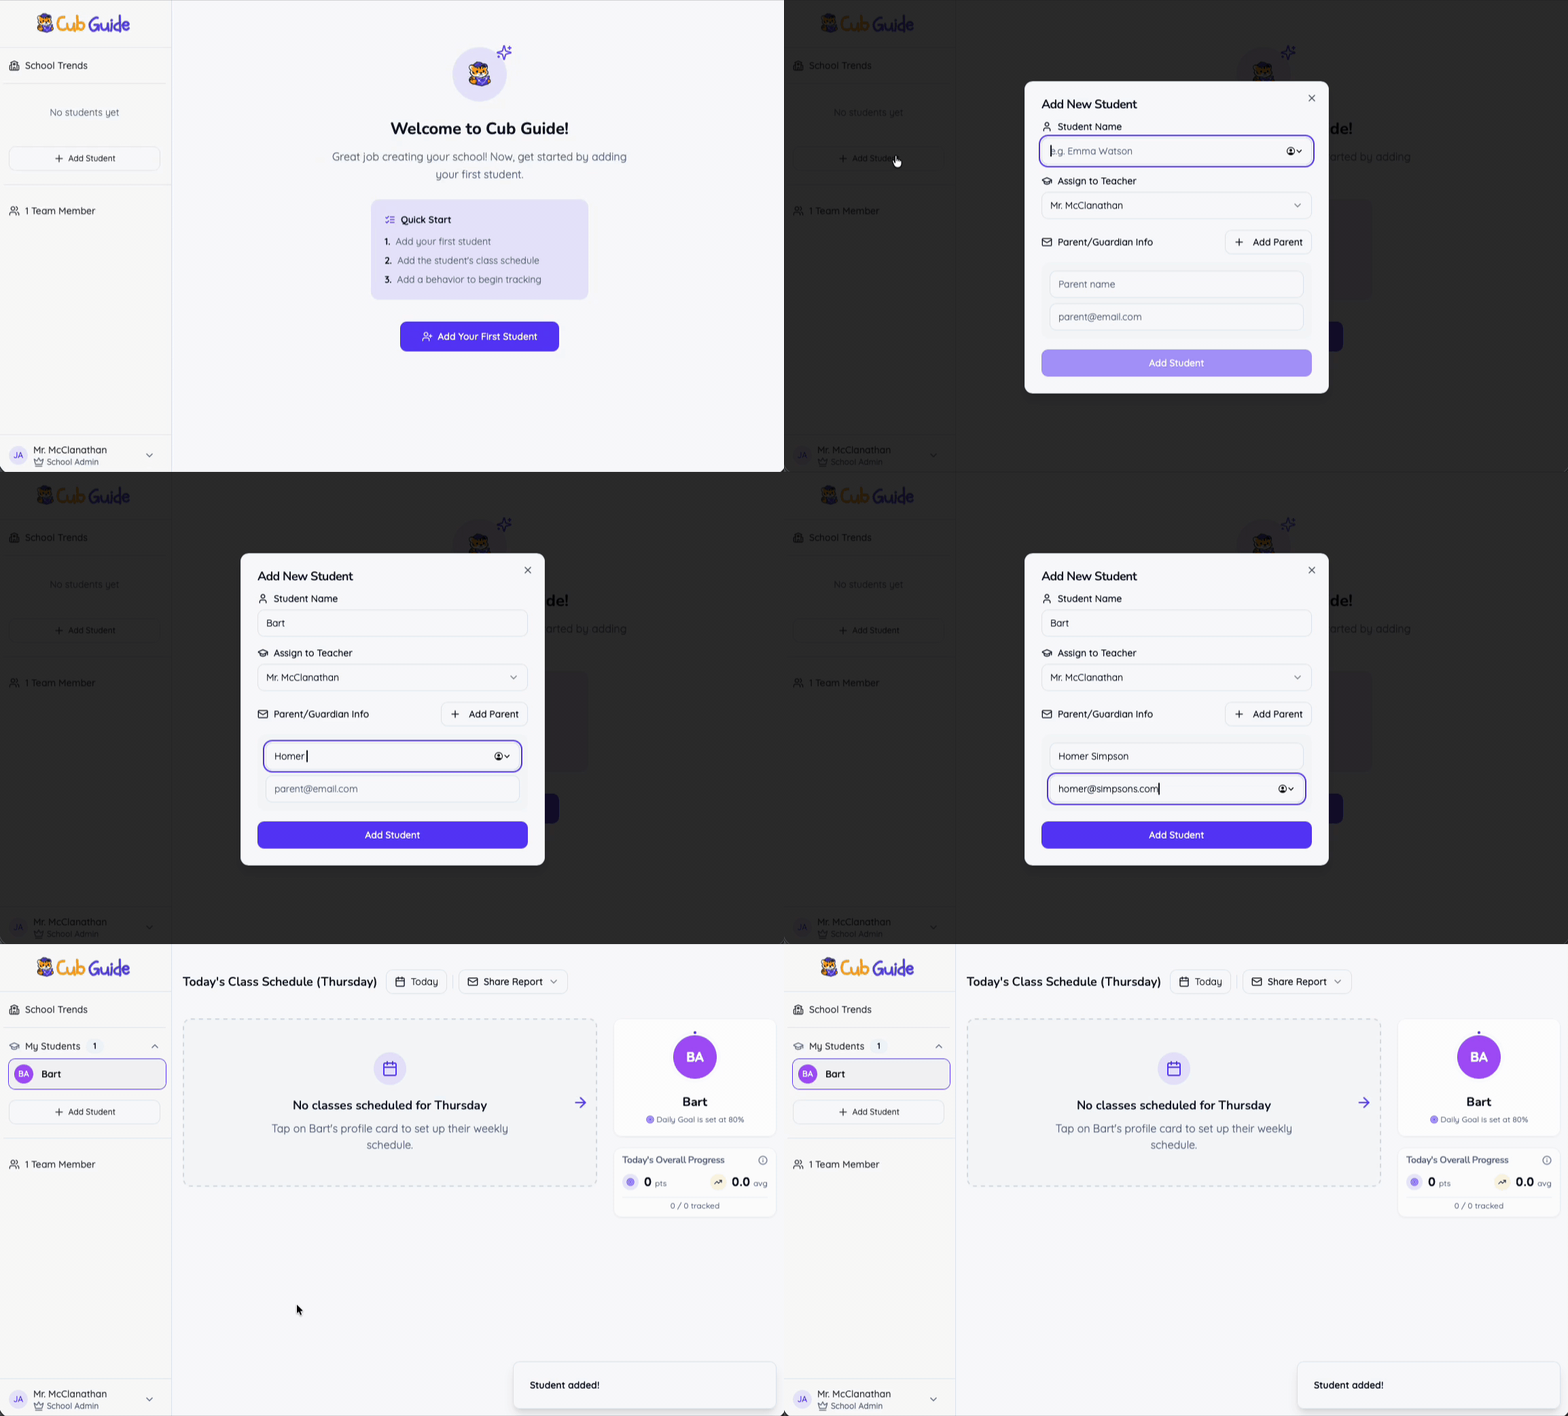
Adding Your First Student
Create a student profile in seconds. Add their name, set a daily behavior goal, and you're ready to start tracking.
- 1Click "Add Student" from the sidebar
- 2Enter the student's name
- 3Enter parent information
- 4Your new student appears in the sidebar instantly
Setting Up the Schedule
Build a weekly schedule so Cub Guide knows which subjects to show each day. Copy schedules between students to save time.
- 1Open the Student Profile page
- 2Click on the Schedule tab
- 3Take a picture or upload an image of the student's schedule
- 3bOR - Manually enter the schedule using the Schedule Builder
- 4Copy a schedule from another student if they share the same classes
Adding Behaviors
Define the specific behaviors you want to track for each student. Customize behavior names and set them up to match your classroom goals.
- 1Open the Student Profile page
- 2Click on the Behaviors tab
- 3Add, rename, or reorder behaviors to match your tracking needs
Rating Behavior
Throughout the day, rate each student's behavior for every subject or time block. Tap a rating, add an optional comment, and move on.
- 1Select the student from the sidebar
- 2Find the current classroom card on the dashboard
- 3Tap a behavior rating (Great / OK / Needs Work) and optionally leave a comment
Viewing Trends & History
See patterns over time with interactive charts. Spot improvements, catch regressions early, and share data-driven insights.
- 1Open the Student Profile and click the Trends tab
- 2View day-by-day rating history and behavior charts
- 3Filter by date range or specific behaviors
Sharing Reports with Parents
Generate a professional daily summary email with one click. Parents stay informed without you writing everything from scratch.
- 1Click the Share Report dropdown
- 2Select Email & Download from the dropdown (only available if a parent email has been added to the student profile)
- 3Attach the downloaded report to the email
- 4Send email
Managing Your School Team
Invite fellow teachers, counselors, or principals to your school. Share students and collaborate on behavior tracking.
- 1Open Team Members from the sidebar
- 2Click on Invite Members
- 3Select the proper Role in the dropdown
- 4Verify the proper email domain
- 5Click on Generate Email
- 6Send email with Join link
Setting Up Student View
Allow students to see their progress throughout the day on their own computer, tablet, or phone. This is a "view only" experience; students can not add or change behavior ratings.
- 1Open the Student Profile and click the Info tab
- 2Set the PIN
- 3Copy/share the unique URL with the student
- 4Copy/Share the unique PIN with the student
No more busy paperwork!
Set up your first student in under a minute. No credit card required.